.jpg)
NFS FOR PERSISTENT VOLUMES
NFS (Network File System) Persistent Volume (PV) is a type of storage volume in Kubernetes that allows you to mount and access an NFS file system as a persistent storage solution for your applications.
Here’s how NFS Persistent Volumes work in Kubernetes:
- NFS Server Setup: First, you need to set up an NFS server that hosts the file system you want to use for persistent storage. The NFS server can be an external server or an NFS server deployed within your cluster.
- PV Definition: In Kubernetes, you define a Persistent Volume (PV) object that represents the NFS file system you want to use. The PV specifies the NFS server’s address, file system path, access modes, and other configuration details.
- PV Provisioning: Once the PV is defined, Kubernetes attempts to provision the NFS volume by establishing a connection to the NFS server and verifying the access credentials. If successful, the PV becomes available for use.
- Persistent Volume Claim (PVC): To consume the NFS PV, you create a Persistent Volume Claim (PVC) object in Kubernetes. The PVC specifies the desired storage requirements, such as storage capacity and access modes. The PVC acts as a request for a matching PV.
- Binding PV and PVC: Kubernetes automatically binds the PVC to an available PV that satisfies the requested storage requirements. If a suitable PV is not available, the PVC remains in the pending state until a matching PV becomes available.
- Mounting the NFS Volume: Once the PV and PVC are bound, you can mount the NFS volume to your application’s pods by referencing the PVC in the pod’s configuration. The application can then read from and write to the NFS volume as if it were a local file system.
- Lifecycle Management: PVs and PVCs can be managed and monitored throughout their lifecycle. You can dynamically create, update, or delete PVs and PVCs based on your application’s storage requirements.
NFS Persistent Volumes provide a flexible and scalable solution for sharing persistent storage across multiple pods in Kubernetes. They enable applications to access shared data and ensure data persistence even when pods are restarted or rescheduled.
Installation On Microk8s-NFS for Persistent Volumes
LAB SETUP:
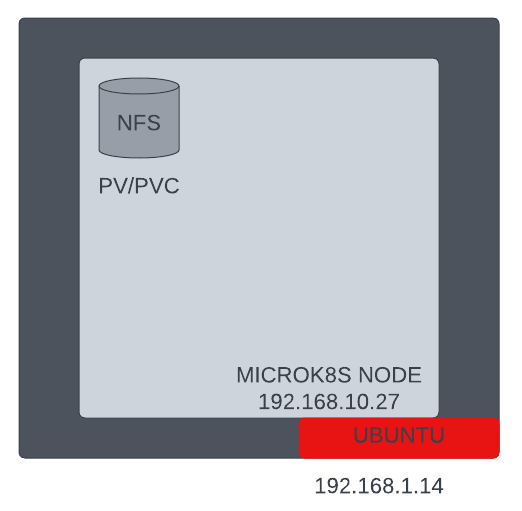
1. Setup an NFS server
sudo apt-get install nfs-kernel-server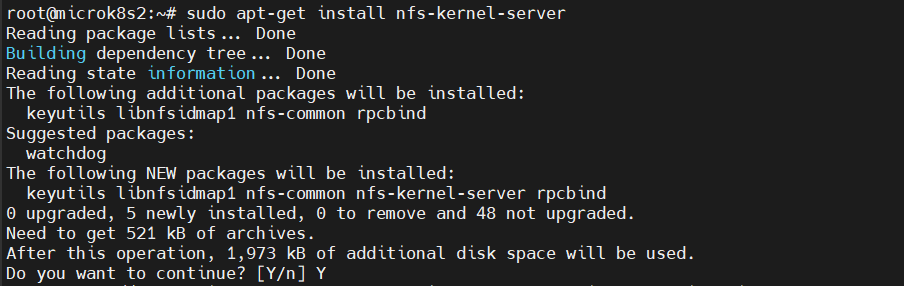
Create a directory to be used for NFS:
sudo mkdir -p /srv/nfssudo chown nobody:nogroup /srv/nfssudo chmod 0777 /srv/nfs
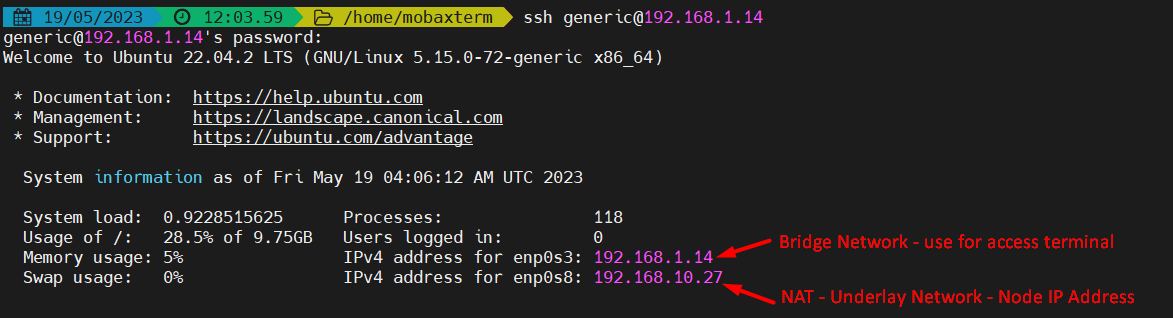
Make sure that the IP addresses of all your MicroK8s nodes are able to mount this share.
sudo mv /etc/exports /etc/exports.bakecho '/srv/nfs 192.168.10.0/24(rw,sync,no_subtree_check)' | sudo tee /etc/exports
Restart server.
sudo systemctl restart nfs-kernel-server
2. Install the CSI driver for NFS
We will use the upstream NFS CSI driver. First, we will deploy the NFS provisioner using the official Helm chart.
Enable the Helm3 addon (if not already enabled) and add the repository for the NFS CSI driver:
microk8s enable helm3microk8s helm3 repo add csi-driver-nfs https://raw.githubusercontent.com/kubernetes-csi/csi-driver-nfs/master/chartsmicrok8s helm3 repo update
Install the Helm chart under the kube-system namespace with –
microk8s helm3 install csi-driver-nfs csi-driver-nfs/csi-driver-nfs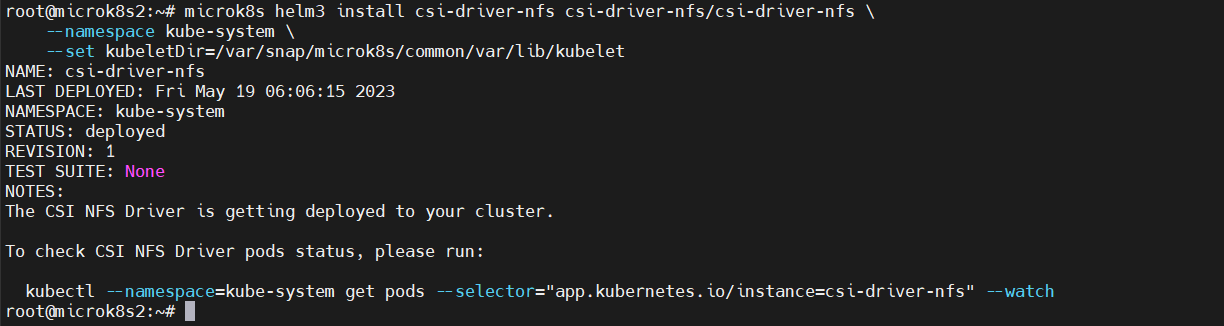
CSI controller and node pods to come up
microk8s kubectl --namespace=default get pods --selector="app.kubernetes.io/instance=csi-driver-nfs" --watch

microk8s kubectl wait pod --selector app.kubernetes.io/name=csi-driver-nfs --for condition=ready --namespace kube-system
Verification CSI Drivers.
microk8s kubectl get csidrivers
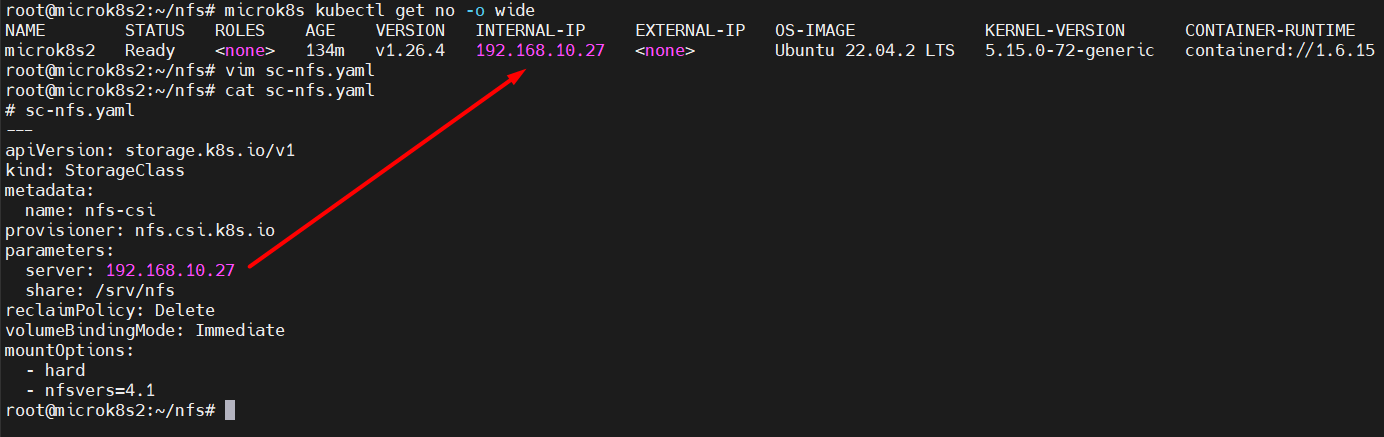
3. Create a StorageClass for NFS
Next, we will need to create a Kubernetes Storage Class that uses the nfs.csi.k8s.io CSI driver.
# sc-nfs.yaml
---
apiVersion: storage.k8s.io/v1
kind: StorageClass
metadata:
  name: nfs-csi
provisioner: nfs.csi.k8s.io
parameters:
  server: 10.0.0.42
  share: /srv/nfs
reclaimPolicy: Delete
volumeBindingMode: Immediate
mountOptions:
  - hard
  - nfsvers=4.1
microk8s kubectl apply -f sc-nfs.yaml
Persistent Volume Claim Yml.
The final step is to create a new PersistentVolumeClaim using the
nfs-csi storage class. This is as simple as specifying storageClassName: nfs-csi in the PVC definition, for example:# pvc-nfs.yaml
---
apiVersion: v1
kind: PersistentVolumeClaim
metadata:
name: my-pvc
spec:
storageClassName: nfs-csi
accessModes: [ReadWriteOnce]
resources:
requests:
storage: 5Gi
microk8s kubectl apply -f pvc1.ymlmicrok8s kubectl get pvmicrok8s kubectl get pvc
No comments:
Post a Comment